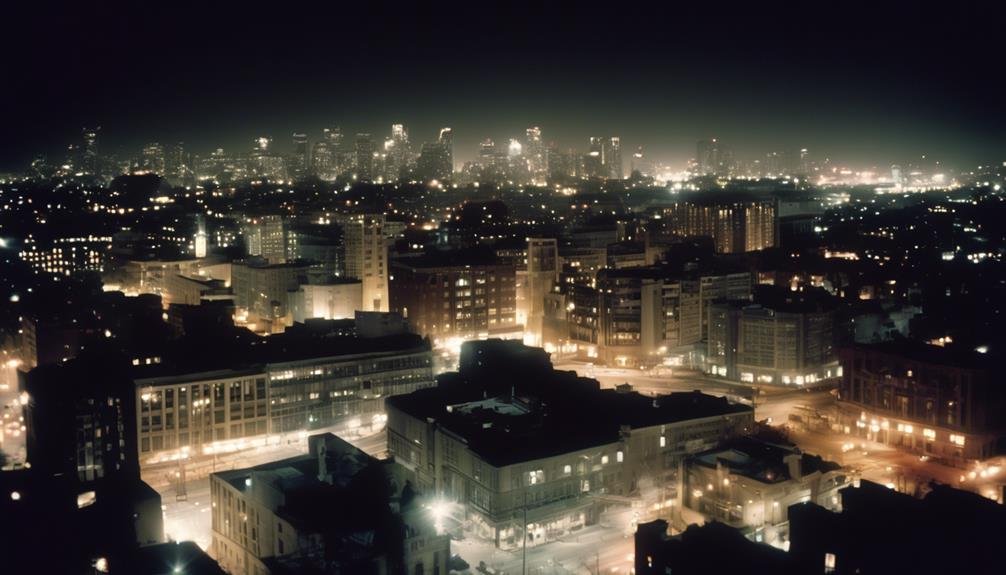
We've all been there – capturing stunning nighttime shots with a mirrorless camera can be a bit challenging, especially if you're new to the game. But did you know that there are specific techniques and settings you can use to significantly boost your mirrorless camera's nighttime prowess? From understanding low light settings to mastering long exposure techniques, there's a whole world of possibilities waiting to be explored. So, how can you harness these tips to elevate your nighttime photography to new heights?
Understand Low Light Settings
Let's dive into understanding low light settings to capture stunning nighttime photos with your mirrorless camera. When shooting in low light, understanding exposure is crucial. Adjusting the exposure settings on your camera can help you achieve the perfect balance of light and darkness in your nighttime photos. Experiment with different exposure times to find the ideal setting for your desired effect. Additionally, mastering white balance techniques is essential for capturing accurate colors in low light conditions. Using the appropriate white balance setting can prevent your nighttime photos from appearing too warm or too cool. By understanding how to adjust the white balance on your mirrorless camera, you can ensure that the colors in your nighttime photos appear true to life. These techniques are vital for producing high-quality nighttime photographs with your mirrorless camera. With a solid grasp of exposure and white balance, you'll be well-equipped to capture the beauty of the night with innovation and precision.
Use Wide Aperture Lenses
How can wide aperture lenses enhance the quality of your nighttime photos with a mirrorless camera? Wide aperture lenses, such as those with an f/1.4 or f/1.8 aperture, are essential for capturing stunning nighttime portraits and engaging in astrophotography. Here's why they're crucial:
- Nighttime Portrait Photography: Wide aperture lenses allow you to achieve a shallow depth of field, resulting in beautifully blurred backgrounds that make your subject stand out, even in low light conditions. This is ideal for capturing intimate and captivating nighttime portraits.
- Lens Selection: When selecting a lens for nighttime photography, opt for prime lenses with wide apertures. These lenses not only let in more light, but also provide sharper images with better overall image quality, making them ideal for capturing the nuances of nighttime scenes.
- Astrophotography and Focusing Techniques: Wide aperture lenses are indispensable for astrophotography, allowing you to capture the breathtaking details of the night sky. Additionally, they enable more accurate manual focusing, which is often necessary for pinpointing stars or celestial objects in the dark.
Experiment With ISO Settings
Have you ever wondered how adjusting the ISO settings on your mirrorless camera can enhance the quality of your nighttime photos? Experimenting with ISO settings is a crucial aspect of nighttime photography. By understanding how ISO affects your images in low light situations, you can significantly improve the outcome of your shots. Here are some tips for ISO experimentation:
| ISO Setting | Outcome |
|---|---|
| Low (e.g. 100-400) | Reduced noise but may require longer shutter speed |
| Moderate (e.g. 800-3200) | Balanced noise and shutter speed |
| High (e.g. 6400 and above) | Increased noise but shorter shutter speed |
Adjusting the ISO setting allows you to control the camera's sensitivity to light. In low light situations, a higher ISO setting can help capture more light, but it may also introduce more noise. Finding the right balance between ISO, aperture, and shutter speed is essential for achieving impressive nighttime shots. Experiment with different ISO settings to understand how they impact the overall image quality. By mastering ISO adjustments, you can elevate your low light techniques and capture stunning nighttime scenes with your mirrorless camera.
Utilize Image Stabilization
When shooting in low light conditions, we need to make sure our images are as stable as possible. Image stabilization can make a huge difference in the sharpness of our nighttime photos. Let's explore different stabilization techniques and how to ensure compatibility with our equipment.
Stabilization Techniques
Utilize image stabilization to capture sharper nighttime photos with your mirrorless camera. When it comes to stabilization techniques for low-light photography, tripod techniques and stabilizing methods are essential for achieving steady shots. Here are some effective methods to help you master nighttime photography:
- Tripod Techniques
- Invest in a sturdy tripod to provide a stable base for your camera.
- Extend the tripod legs fully and use a weighted hook to minimize movement.
- Stabilizing Methods
- Use image stabilization features on your lens or camera body to reduce blur from shaky hands.
- Consider using a remote shutter release or the camera's self-timer to minimize any movement when pressing the shutter button.
Equipment Compatibility
To ensure optimal image stabilization for nighttime photography with a mirrorless camera, it is essential to consider the compatibility of your equipment, particularly the utilization of image stabilization features. When selecting a lens for your mirrorless camera, it's crucial to ensure compatibility with the camera body's image stabilization system. Many mirrorless cameras feature in-body image stabilization (IBIS), which can work in conjunction with lens stabilization for even better results. When choosing lenses, look for those with built-in optical stabilization, often denoted as OIS, VR, or IS, to complement the camera's IBIS. This dual-stabilization setup can significantly enhance low-light performance, allowing you to capture sharp, clear images in challenging nighttime conditions. By carefully considering camera and lens compatibility, you can maximize the effectiveness of image stabilization for your mirrorless camera, leading to better nighttime photography results.
Master Long Exposure Techniques

One key aspect of mastering long exposure techniques for nighttime photography is understanding the impact of different shutter speeds on capturing stunning light trails and nightscapes. When we improve composition, we can enhance creativity and take our nighttime photography to the next level. Here are some tips to help you master long exposure techniques:
- Experiment with Different Shutter Speeds: Varying your shutter speed can produce different effects. Try using slower shutter speeds for light trails and longer streaks of light, or faster shutter speeds to capture crisp, sharp images of stationary subjects within the night scene.
- Use a Tripod for Stability: Stability is crucial for long exposure shots. A sturdy tripod will help eliminate camera shake and ensure sharp, clear images. Consider investing in a remote shutter release to further minimize any potential movement during long exposures.
- Utilize ND Filters: Neutral density (ND) filters reduce the amount of light entering the lens without affecting color. They allow for longer exposures even in bright conditions, opening up more creative possibilities for nighttime photography.
Mastering these long exposure techniques will not only improve the technical quality of your nighttime shots but also enhance your ability to capture the creative essence of the night.
Learn to Use Manual Focus
When shooting in low light conditions, manual focus allows us to achieve precision and control over our images. By mastering the focus ring, we can ensure that our subjects are crisp and clear, even in challenging nighttime settings. The benefits of using manual focus in these situations cannot be overstated, and it's a crucial skill for any photographer looking to capture stunning nighttime shots.
Precision in Low Light
In low light situations, achieving precise focus can be challenging, but mastering manual focus techniques can greatly improve the clarity and sharpness of your nighttime photographs. To enhance precision in low light, consider the following tips:
- Utilize Focus Peaking: This feature highlights in-focus areas, aiding in achieving sharpness even in dimly lit scenes.
- Magnify the Image: Enlarge the view on your camera's screen to ensure accurate focus on your subject.
- Use a Flashlight or LED Light: To assist in focusing, illuminate your subject with a small light source, making it easier to fine-tune your manual focus.
Benefits of Control
Mastering manual focus on a mirrorless camera allows photographers to gain precise control over their focus, resulting in sharper and more impactful nighttime images. The benefits of control in low light settings are significant. By using manual focus, we can precisely adjust the focus on the subject, ensuring that even in challenging low light conditions, our images remain sharp and clear. This level of control empowers us to capture stunning details and create visually striking nighttime photographs. Additionally, manual focus enables us to fine-tune our composition, ensuring that the most important elements are perfectly in focus. With the ability to take full control over the focus, photographers can unleash their creativity and push the boundaries of nighttime photography, resulting in compelling and extraordinary images.
Mastering Focus Ring
With the focus ring, photographers can achieve precise control over the focus of their mirrorless camera, enhancing the sharpness and clarity of nighttime images. Mastering the focus ring opens up a world of creative possibilities for capturing stunning nighttime shots. Here's how to make the most of it:
- Understanding Depth of Field: Adjust the focus ring to control the depth of field, allowing you to emphasize specific elements in your nighttime scenes.
- Experimenting with Different Focusing Techniques: Try using techniques like focus stacking or hyperfocal distance to maximize sharpness and clarity in low light conditions.
- Leveraging Manual Focus for Low-Light Situations: In challenging nighttime settings, manual focus can often outperform autofocus, enabling precise control over what elements are in focus.
Consider Low Light Accessories
Consider incorporating a high-quality prime lens or a fast aperture zoom lens to enhance your camera's performance in low light conditions. These lenses allow more light to reach the camera sensor, resulting in better image quality and reduced noise in low light settings. Additionally, investing in low light filters can significantly improve your nighttime photography. A good quality low light filter, such as a neutral density filter or a graduated filter, can help control the amount of light entering the lens, especially in situations with strong artificial lighting or when shooting in challenging twilight conditions.
External flashes are another essential accessory for low light photography. They provide additional light sources, allowing you to illuminate your subjects effectively in dimly lit environments. When choosing an external flash, look for one with a tilting and rotating head to bounce light off ceilings or walls, creating softer and more natural-looking illumination.
Optimize White Balance
To achieve accurate and natural-looking colors in your nighttime photos, ensure you optimize the white balance setting on your mirrorless camera. Here are some key tips to help you understand and adjust the white balance effectively:
- Understand Color Temperature: Familiarize yourself with the concept of color temperature and its impact on your photos. Lower color temperatures (around 2500-4000K) produce warmer tones, while higher temperatures (5000-6500K) result in cooler, bluer tones. Understanding this will help you choose the right white balance setting for different lighting conditions.
- Use Custom White Balance: Consider using the custom white balance feature on your camera to capture accurate colors in challenging lighting situations. This allows you to take a reference shot of a neutral object under the same lighting and set it as the white balance for your photos.
- Experiment with Preset Modes: Explore the preset white balance modes on your camera, such as tungsten, fluorescent, daylight, cloudy, and shade. These presets are designed to compensate for the color casts produced by different light sources, providing a quick and convenient way to adjust the white balance.
Mastering white balance adjustment and understanding color temperature will greatly enhance the quality of your nighttime photography, ensuring that your images accurately represent the scene's natural colors.
Harness the Power of RAW
Exploring the power of shooting in RAW format expands our creative control over the captured image, building upon the foundation of understanding color temperature and white balance optimization. RAW files contain unprocessed data straight from the camera sensor, allowing for extensive raw editing and preservation of image quality. When shooting in low light, RAW format becomes even more crucial as it retains as much detail as possible in challenging lighting conditions. This is especially beneficial for nighttime photography, as it allows for greater flexibility in post-processing, including adjustments to exposure, shadows, and noise reduction.
| RAW Editing Tips | Description |
|---|---|
| Adjust Exposure | Increase or decrease the overall exposure of the image to bring out details in low light composition. |
| Reduce Noise | Use noise reduction tools to minimize graininess in the image, which is common in low light scenarios. |
| Enhance Shadows | Lift shadows to reveal hidden details in darker areas of the photograph, creating a more balanced and dynamic image. |
Shooting in RAW format empowers photographers to push the boundaries of creativity and technical precision, making it an invaluable tool for capturing stunning nighttime scenes.
Explore Noise Reduction Tools
Let's talk about noise reduction tools for nighttime photography. Understanding the basics of noise reduction and learning advanced techniques can make a significant difference in the quality of your low-light images. From reducing grain to preserving sharpness, noise reduction tools can help us capture stunning nighttime shots with our mirrorless cameras.
Noise Reduction Basics
We can effectively reduce noise in low light photographs by utilizing noise reduction tools available in our mirrorless cameras. Understanding noise and reducing noise is essential for capturing high-quality nighttime shots. Here are some tips to help you explore noise reduction basics:
- Use In-Camera Noise Reduction: Take advantage of your camera's built-in noise reduction feature to automatically reduce noise in your images.
- Utilize Post-Processing Software: Consider using post-processing software with advanced noise reduction algorithms to further enhance the quality of your low light photos.
- Adjust ISO Settings: Experiment with different ISO settings to find the optimal balance between exposure and noise levels in your nighttime images.
Advanced Noise Reduction Techniques
After familiarizing ourselves with the basics of noise reduction, we can now delve into advanced techniques and explore the array of noise reduction tools available to elevate the quality of our nighttime photography. When it comes to advanced noise reduction, utilizing smartphone apps and editing software can significantly enhance the results. Smartphone apps like Lightroom Mobile and Snapseed offer powerful noise reduction tools that are convenient for on-the-go editing. Additionally, advanced editing software such as Adobe Photoshop and DxO PhotoLab provide more intricate noise reduction capabilities, allowing for fine-tuning and customization. These tools often feature advanced algorithms and machine learning technologies to effectively reduce noise while preserving image details. By incorporating these advanced noise reduction techniques into our workflow, we can achieve stunning nighttime photos with minimal noise interference.
| Smartphone Apps | Editing Software |
|---|---|
| Lightroom Mobile | Adobe Photoshop |
| Snapseed | DxO PhotoLab |
Practice Proper Exposure Compensation
To achieve optimal results when shooting with a mirrorless camera at night, it is crucial to master the practice of proper exposure compensation. Exposure control is essential for capturing stunning nighttime shots with a mirrorless camera. Here are three key tips to help you practice proper exposure compensation and enhance your nighttime shooting techniques:
- Understand Exposure Compensation: Familiarize yourself with exposure compensation to adjust the camera's automatic exposure settings. This allows you to brighten or darken your images as needed, especially in low-light conditions.
- Experiment with Manual Mode: Explore your camera's manual mode to have complete control over the exposure settings. By adjusting the aperture, shutter speed, and ISO, you can fine-tune the exposure for nighttime shots and achieve the desired creative effects.
- Use Histogram for Guidance: Utilize the histogram feature on your camera's display to analyze the distribution of light in your images. This tool provides valuable feedback on exposure levels, helping you make informed decisions for better night photography.
Mastering exposure compensation and refining your nighttime shooting techniques will empower you to capture breathtaking images with your mirrorless camera, even in challenging lighting conditions.
Embrace Mirrorless-Specific Features
Now that we have honed our exposure compensation skills for nighttime photography with a mirrorless camera, let's explore the unique features that make mirrorless cameras ideal for capturing stunning night shots. One of the most exciting aspects of mirrorless cameras is their electronic viewfinders (EVF). These EVFs give us a real-time preview of the exposure, allowing us to adjust settings and see how they impact the final image even in low light conditions. Additionally, the ability to use focus peaking, a mirrorless-specific technology, enhances our low light composition techniques. This feature highlights in-focus areas with a colored outline, making it easier to achieve sharp focus in dimly lit environments. Furthermore, mirrorless cameras often come with in-body image stabilization (IBIS), which is incredibly beneficial for handheld night photography. This technology compensates for camera shake, allowing us to use slower shutter speeds without sacrificing image sharpness. Embracing these mirrorless-specific features empowers us to push the boundaries of nighttime photography, capturing remarkable images with creativity and precision.
Leverage Post-Processing Tools
Let's talk about the crucial step of post-processing when it comes to enhancing our nighttime shots. We'll cover the basics of post-processing, including essential software and techniques for reducing noise in our low-light images. This step is where we can truly bring out the best in our nighttime captures, so let's dive in and explore how to make the most of our post-processing tools.
Post-Processing Basics
Leveraging post-processing tools enhances the quality and creativity of nighttime photos captured with a mirrorless camera. When delving into the world of post-processing, it's essential to understand the basics of editing workflow and color correction to elevate your nighttime shots. Here are some tips to help you navigate the post-processing stage:
- Organize Your Workflow
- Establish a systematic approach to organizing and editing your nighttime photos.
- Streamline your process to ensure efficiency and consistency in your editing workflow.
- Utilize presets or create your own to maintain a cohesive look across your nighttime photo collection.
Software Selection
Selecting the right software for post-processing your nighttime photos captured with a mirrorless camera can significantly impact the quality and final look of your images. When it comes to software compatibility, it's essential to choose a post-processing software that fully supports the RAW files produced by your mirrorless camera. Look for programs that offer advanced noise reduction, as this is crucial for cleaning up low-light shots. Additionally, consider software with powerful sharpening tools to enhance details that may have been lost in the dark. Adobe Lightroom and Capture One are popular choices known for their excellent RAW file support and comprehensive post-processing capabilities. These programs can help you bring out the best in your nighttime photos, ensuring that your mirrorless camera captures are truly stunning.
Noise Reduction Techniques
When it comes to post-processing nighttime photos taken with a mirrorless camera, a crucial aspect is employing effective noise reduction techniques using specialized software tools. Here are some tips to help you make the most of your image editing and post-processing techniques:
- Choose the Right Software: Select a noise reduction software that offers customizable settings and produces high-quality results.
- Look for tools with advanced algorithms specifically designed for noise reduction in low-light conditions.
- Consider software that allows for selective noise reduction to preserve important details in your nighttime photos.
- Explore options that offer batch processing capabilities to streamline the noise reduction process for multiple images at once.
Familiarize Yourself With Night Modes
One key to capturing stunning nighttime photos with a mirrorless camera is to become familiar with the various night modes available on your device. Understanding night photography and using night mode effectively can significantly enhance your low-light shooting capabilities. Night modes are specifically designed to optimize the camera settings for capturing high-quality images in low light conditions. Here are some common night modes and their functions:
| Night Mode | Description | Best Use |
|---|---|---|
| Night Scene | Enhances overall brightness and detail in low light | Cityscapes, landscapes, or any low-light environment |
| Night Portrait | Balances background and foreground lighting | Portraits or close-up shots in low-light settings |
| Handheld Night | Reduces noise and blurring for handheld shots | Low-light situations where using a tripod isn't feasible |
| Night Landscape | Optimizes settings for distant, low-light subjects | Astrophotography or capturing nighttime natural scenery |
Continuous Learning and Practice
Exploring new techniques and consistently practicing night photography with your mirrorless camera can greatly improve your skills and confidence in capturing stunning low-light images. Continuous improvement is key, and practical application of new knowledge is essential for mastery. Here are some ways to make the process enjoyable and effective:
- Join Night Photography Workshops: Participating in workshops led by experienced photographers can provide valuable insights and hands-on learning opportunities.
- Experiment with Different Settings: Take the time to test out various camera settings, such as ISO, aperture, and shutter speed, to understand their impact on nighttime shots.
- Seek Feedback and Critique: Sharing your work with a supportive community or seeking feedback from professionals can offer fresh perspectives and help you identify areas for improvement.
Frequently Asked Questions
How Can I Reduce Noise in My Nighttime Photos Without Using Post-Processing Tools?
We master the art of capturing crisp nighttime shots without relying on post-processing tools. By maximizing long exposure and ensuring tripod stability, we elevate our low-light photography game, delivering noise-free, stunning images.
Are There Specific Mirrorless Camera Features That Are Particularly Useful for Nighttime Photography?
Yes, mirrorless cameras offer low-light capabilities, making them ideal for night photography. Their electronic viewfinders and in-body image stabilization enhance low-light performance. A wide aperture lens selection further maximizes their nighttime prowess.
What Are Some Low Light Accessories That Can Significantly Improve My Nighttime Photography?
Low light filters and nighttime tripods are game-changers for low light photography. With the right mirrorless camera settings and low light lenses, we capture stunning nighttime shots. It's all about enhancing our gear for epic results.
How Can I Effectively Utilize Image Stabilization in Low Light Conditions?
We utilize tripod stability and low light lenses to maximize image stabilization in low light conditions. These tools help us capture sharp, clear photos in challenging lighting, allowing us to achieve stunning nighttime photography results.
Are There Any Specific Techniques for Leveraging Post-Processing Tools to Enhance Nighttime Photos?
We've found that post-processing tools can work wonders for nighttime photos. Utilize advanced editing techniques to enhance the mood and details. Experiment with contrast, exposure, and color adjustments to bring out the magic in your nighttime shots.
