
Have you ever wondered how to capture sharp, clear images in low light conditions without the use of flash? It’s a common challenge for many photographers, but fear not, as we’ve compiled a comprehensive guide to help you master the art of low light photography stabilization. From understanding the various image stabilization systems to optimizing your camera settings and utilizing external stabilization tools, we’ll cover everything you need to know to elevate your low light photography game. So, whether you’re a seasoned pro looking to refine your techniques or a beginner eager to learn the ropes, our 9 best tips will equip you with the knowledge and skills to tackle low light scenarios with confidence and precision.
Understanding Image Stabilization Systems
Let’s dive into the world of image stabilization systems and understand how they can dramatically improve the quality of our low light photography. Camera stabilization is a game-changer when shooting in low light conditions. It helps eliminate the blur caused by hand movements, resulting in sharper images. Many modern cameras come with built-in stabilization, while older models may require the use of stabilized lenses. When it comes to lens stabilization, it’s all about compensating for the small movements that can occur while capturing an image. This feature is especially crucial when shooting in low light, as it allows for longer exposure times without sacrificing sharpness.
Understanding how camera and lens stabilization work is essential for achieving clear and focused low light shots. By reducing the effects of camera shake and small movements, stabilization systems enable us to capture stunning images even in challenging lighting conditions. So, whether you’re using a camera with built-in stabilization or opting for stabilized lenses, mastering these technologies can significantly enhance your low light photography skills.
Choosing the Right Camera and Lens Combo
When selecting the ideal camera and lens combination for low light photography, it is crucial to consider the specific requirements of the shooting environment and the desired image outcome. Camera selection plays a vital role in low light photography. Look for cameras with larger sensors, as they perform better in low light conditions by producing less noise. Additionally, consider cameras with good high ISO performance for better results in dimly lit settings. It’s also important to ensure that the chosen lens is compatible with the camera. Some lenses are specifically designed for low light conditions, offering wider apertures that allow more light to enter the camera. When it comes to lens compatibility, ensure that the lens mount is compatible with your camera body. Furthermore, look for lenses with optical image stabilization (OIS) or in-body image stabilization (IBIS) to counteract camera shake in low light situations, resulting in sharper images. By carefully considering camera selection and lens compatibility, photographers can ensure they have the best tools for capturing stunning low light images.
Utilizing Tripods and Monopods Effectively
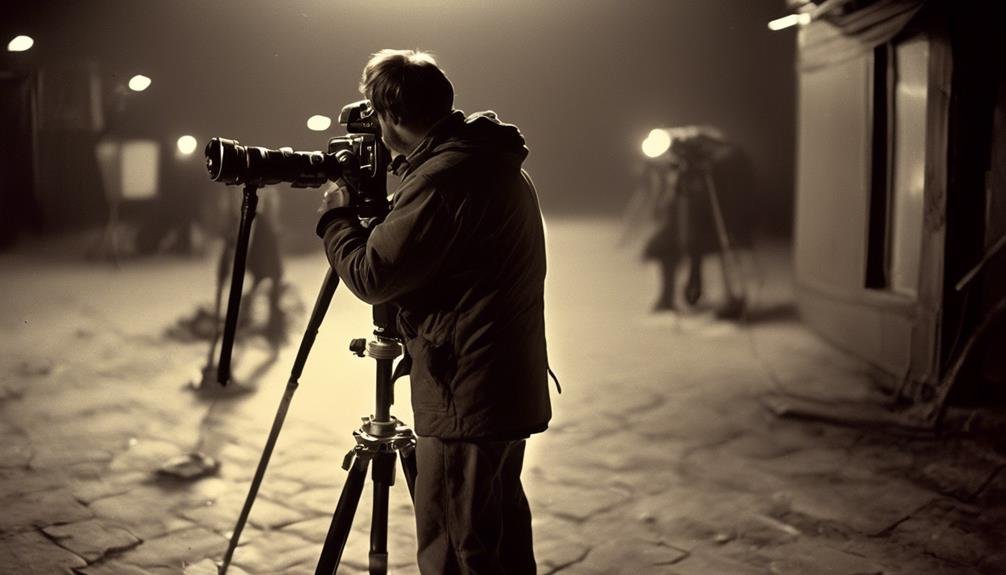
Carefully selecting the right support equipment, such as tripods and monopods, is essential for achieving stability and sharpness in low light photography. Tripods offer stability in movement, allowing for long exposures without the risk of camera shake, while monopods provide versatility in angles and are ideal for situations that require mobility. When utilizing tripods and monopods effectively, there are key considerations to keep in mind to maximize their benefits.
| Tripod Stability | Monopod Flexibility |
|---|---|
| Choose a sturdy tripod with adjustable legs and a solid ball head for smooth panning and tilting. | Opt for a lightweight and compact monopod that can be easily maneuvered to capture shots from various angles. |
| Use a remote shutter release or self-timer to minimize vibrations when pressing the shutter button. | Utilize a monopod with a swiveling head to quickly adjust the camera position without compromising stability. |
| Ensure the tripod is set up on a stable surface and extend the center column only when necessary to maintain rigidity. | Take advantage of the monopod’s portability by using it in crowded or confined spaces where tripods are impractical. |
| Experiment with different tripod heights and leg angles to achieve the desired composition and minimize the risk of wind-induced vibrations. | Employ the monopod as a walking stick for added stability when shooting in challenging terrain or uneven surfaces. |
| Consider using a tripod with a hook on the center column to hang a weight for increased stability in windy conditions. | Utilize the monopod’s single-legged design to quickly react to changing photo opportunities, ensuring flexibility in fast-paced shooting environments. |
Mastering Handheld Shooting Techniques
When it comes to mastering handheld shooting techniques, one of the key points to focus on is our grip and posture. We need to ensure that we have a secure and stable hold on the camera to minimize shake and blur. Additionally, paying attention to our breathing techniques can greatly impact the steadiness of our shots, helping us capture clear and sharp images even in low light conditions.
Grip and Posture
Mastering handheld shooting techniques requires maintaining a steady and comfortable grip on the camera while adopting a posture that minimizes movement and maximizes stability. To achieve correct posture, stand with your feet shoulder-width apart, slightly bend your knees, and keep your elbows tucked in close to your body. This stance provides a stable base and minimizes body sway. When it comes to the grip, ergonomic grips can significantly enhance stability and comfort during prolonged shooting sessions. Look for a grip that allows your fingers to comfortably reach the shutter button and provides a secure hold on the camera. Additionally, ensure that your grip is firm but relaxed to avoid unnecessary tension in your hands and arms. By mastering your grip and posture, you’ll be better equipped to capture sharp, blur-free images in low light conditions.
Breathing Techniques
Maintaining a steady grip and stable posture is essential for low light photography, and now let’s explore how incorporating specific breathing techniques can further enhance our handheld shooting abilities. Deep breathing plays a crucial role in steadying our bodies and calming our minds, both of which are vital for capturing sharp images in low light conditions. By consciously taking slow, deep breaths, we can reduce muscle tension and minimize camera shake. Additionally, practicing meditation techniques can help us improve our focus and concentration, leading to better control over our shooting movements. During challenging low light situations, implementing these breathing techniques can make a significant difference in the sharpness and clarity of our handheld shots. So, let’s harness the power of our breath to elevate our low light photography skills to new heights.
Exploring In-Camera Stabilization Features
In our pursuit of capturing stable and sharp low light photos, it’s crucial to explore the in-camera stabilization features available to enhance our photography. When delving into in-camera stabilization, it’s essential to understand the advantages and limitations of both lens stabilization and sensor stabilization:
- Lens Stabilization
- Pros: Lens stabilization systems are often highly effective in reducing camera shake, especially at longer focal lengths, providing immediate stabilization feedback through the optical viewfinder, and are generally more affordable in smaller lenses.
- Cons: Lens stabilization is specific to each lens, which means that if you have multiple lenses, you may need to invest in stabilization for each one, and it may not be as effective for certain types of movements or vibrations.
- Sensor Stabilization
- Advantages: Sensor stabilization works with any lens attached to the camera, making it a versatile option, and it can be highly effective for reducing camera shake when shooting handheld in low light conditions.
- Limitations: While sensor stabilization is beneficial for most situations, it may not entirely eliminate blur from very fast movements, and it may not provide stabilization feedback through the optical viewfinder in the same way as lens stabilization.
Understanding these features and their nuances can help us make informed decisions when utilizing in-camera stabilization for low light photography.
Leveraging External Stabilization Tools
When capturing stable and sharp low light photos, external stabilization tools can significantly enhance the quality of our photography. One innovative tool that has revolutionized low light photography is gimbal technology. Gimbals provide smooth, steady movement and can be used with both smartphones and traditional cameras, making them versatile for various shooting scenarios. The precision and control offered by gimbals allow us to capture clear, blur-free images even in challenging low light conditions.
In addition to gimbal technology, mastering handheld stabilization techniques can also elevate our low light photography. Techniques such as the triangle method, where we create a stable base by positioning our elbows against our body, can greatly reduce camera shake. Furthermore, using a wrist strap or harness can provide added stability and minimize the risk of dropping our equipment in low light environments.
Optimizing ISO and Shutter Speed Settings
To capture clear and sharp low light photos, we optimize our ISO and shutter speed settings to ensure proper exposure and minimize motion blur. Understanding exposure is key to achieving great low light photos. Here are some tips to optimize ISO and shutter speed settings:
- Balancing ISO and Aperture: We carefully balance ISO and aperture settings to control the amount of light reaching the camera sensor. This balance helps in reducing noise while maintaining image sharpness in low light conditions.
- Adjusting the ISO: We increase the ISO sensitivity to amplify the available light in low light situations, but we are cautious not to set it too high to avoid excessive noise.
- Setting the Shutter Speed: We use longer shutter speed techniques to capture more light in low light conditions. However, we also pay attention to avoiding camera shake by using tripods or other stabilizing tools.
Using Image Stabilization in Post-Processing
When it comes to low light photography, using image stabilization in post-processing can make a significant difference in the sharpness and clarity of our images. We’ll explore post-processing stabilization techniques that can help salvage photos taken in challenging lighting conditions. Understanding the benefits of image stabilization and how to effectively apply it in post-processing can elevate the quality of our low light photography.
Post-Processing Stabilization Techniques
Consider using image stabilization techniques during post-processing to enhance the sharpness and clarity of your low light photographs.
- Noise Reduction:
- Utilize noise reduction tools in post-processing software to minimize the graininess often present in low light images.
- Sharpening Techniques:
- Experiment with various sharpening tools to bring out the fine details and textures in your low light photographs.
- Selective Masking:
- Apply selective masking to sharpen specific areas of the image while preserving smoother areas, creating a balanced and natural look.
Benefits of Image Stabilization
After fine-tuning your low light photographs with post-processing stabilization techniques, the benefits of image stabilization become evident in enhancing the overall quality and sharpness of the images. Image stabilization is crucial for addressing the challenges posed by low light conditions, ensuring that your photos are clear, detailed, and free from blur. By utilizing stabilization techniques in post-processing, you can significantly improve the visual appeal of your low light photography. The importance of stabilization cannot be overstated, as it allows for the creation of stunning, professional-quality images even in challenging lighting situations. Below, we’ve outlined some key benefits of image stabilization in post-processing:
| Benefits of Image Stabilization |
|---|
| Minimizes blur and distortion |
| Enhances overall image quality |
| Improves sharpness and detail |
Practicing Patience and Persistence
With determination and perseverance, mastering low light photography requires patience and practice to achieve the best results. It’s essential to embrace the process and continually work on honing your skills in challenging lighting conditions. To excel in low light photography, we recommend the following strategies:
- Practicing Mindfulness: Cultivate an awareness of the present moment while shooting in low light. Mindfulness can help you stay focused on the task at hand, enabling you to make precise adjustments and capture stunning images even in dimly lit environments.
- Engage in deep breathing exercises to center your focus and maintain a steady hand while shooting in low light conditions.
- Take a moment to observe the available light and how it interacts with your subject, allowing you to make informed decisions about your camera settings.
- Setting Realistic Goals: Recognize that mastering low light photography is a gradual process. Set achievable milestones for yourself, and celebrate the progress you make along the way.
- Seeking Feedback and Learning: Embrace a growth mindset by actively seeking feedback on your low light photography work. Engage with the photography community to learn from others’ experiences and gain insights that can elevate your skills.
Frequently Asked Questions
Can Low Light Photography Stabilization Techniques Be Used for Video as Well?
Yes, low light video stabilization techniques can be used for better video quality. We’ve found that techniques like using a tripod, image stabilization, and increasing ISO can significantly improve video stability in low light conditions.
How Do Different Types of Camera Sensors Affect Low Light Photography Stabilization?
When it comes to different camera sensor types and low light photography stabilization, the key lies in understanding how ISO settings, lens choice, and shutter speed work together with image stabilization techniques to capture clear, sharp images.
Are There Any Specific Accessories or Gear That Can Enhance Low Light Photography Stabilization?
We’ve found that specific accessories like lens stabilizers and handheld stabilizers can greatly enhance low light photography stabilization. Additionally, exploring tripod alternatives and utilizing innovative lighting solutions can further improve the quality of low light photography.
What Are Some Common Mistakes to Avoid When Trying to Stabilize Low Light Photography?
When trying to stabilize low light photography, common mistakes include neglecting exposure settings, relying solely on tripod alternatives, or using shaky handheld techniques. It’s crucial to master exposure and explore various stabilization methods.
How Can I Improve My Focusing Techniques in Low Light Conditions for Better Stabilization?
We’ve discovered that in low light, improving focus is key to better stabilization. Nighttime shooting techniques like using a high-contrast target for autofocus assist and manual focusing with focus peaking have made a significant impact on our results.
