
When we're capturing images in low light, it's like trying to navigate through a dimly lit room filled with hidden obstacles. The struggle with noise can be frustrating, but fear not. We've compiled 12 practical and effective tips for reducing noise in low light situations that will help you achieve clearer and more professional-looking photos. Whether you're a seasoned photographer or just starting out, these techniques will elevate your low light photography game and ensure that your images stand out for all the right reasons.
Use a Wide Aperture
To reduce noise in low light conditions, using a wide aperture allows more light to enter the camera, resulting in clearer and sharper images. When considering lens selection for low light photography, opt for a lens with a wide maximum aperture, such as f/1.8 or f/2.8. This enables the lens to gather more light, which is especially beneficial when shooting in dimly lit environments. Additionally, a wider aperture creates a shallower depth of field, allowing for the subject to stand out against a beautifully blurred background.
Furthermore, when using a wide aperture, it's crucial to pay attention to the exposure time. In low light situations, a longer exposure time may be necessary to capture enough light for a well-exposed image. However, this also increases the risk of camera shake, leading to potential blurriness in the photo. To combat this, consider using a tripod to stabilize the camera during longer exposures.
Optimize ISO Settings
Let's talk about optimizing ISO settings for low light photography. Adjusting the ISO sensitivity can significantly impact the amount of noise in your photos. We'll also explore noise reduction techniques to help you capture clear, high-quality images in low light situations.
ISO Sensitivity
How can we optimize the ISO settings to reduce noise in low light conditions? When shooting in low light, adjusting the ISO sensitivity is crucial for exposure control and maintaining image quality. Finding the right balance is key to capturing clear, noise-free photos. Higher ISO settings increase the camera's sensitivity to light, allowing for faster shutter speeds in low light conditions, but they can also introduce more noise. On the other hand, lower ISO settings produce less noise but require longer exposure times. To strike the right balance, consider the available light and desired image quality. Experiment with different ISO settings to find the optimal balance between exposure control and noise reduction.
| ISO Setting | Description |
|---|---|
| Low | Less sensitive to light |
| Medium | Moderate sensitivity to light |
| High | Highly sensitive to light |
Noise Reduction Techniques
When optimizing ISO settings for noise reduction in low light conditions, it is essential to carefully consider the balance between sensitivity to light and image quality. To achieve optimal noise reduction, we recommend the following techniques:
- Utilize software options: Take advantage of advanced noise reduction software that can effectively minimize noise while preserving image details.
- Leverage sensor technology: Select cameras with modern sensor technology designed to handle low light conditions more effectively, reducing the amount of noise in captured images.
- Experiment with ISO settings: Adjust ISO settings to find the optimal balance between sensitivity to light and noise levels, ensuring the best possible image quality.
Employ Long Exposure Techniques
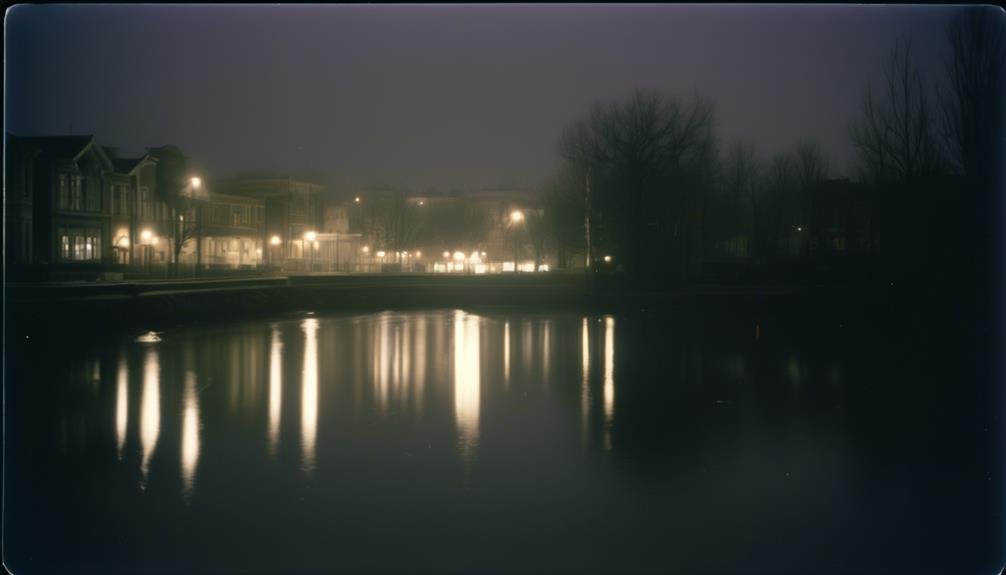
When shooting in low light conditions, employing long exposure techniques can significantly improve the quality of your images. Using a tripod for stability is crucial to avoid any unwanted blurriness caused by camera shake. Adjusting the ISO settings and considering noise reduction can further enhance the overall image quality in low light situations.
Use Tripod for Stability
To achieve stability and reduce noise in low light conditions, using a tripod and employing long exposure techniques is essential. The benefits of using a tripod for stability and long exposure include:
- Stability Techniques: A tripod provides a steady base, minimizing camera shake and ensuring sharp, clear images even in low light situations.
- Image Stabilization: By using a tripod, photographers can take advantage of longer exposure times without introducing blur, resulting in cleaner, noise-free images.
- Tripod Benefits: Using a tripod allows for precise framing and composition, enabling the capture of intricate details in low light settings.
Employing a tripod for stability and utilizing long exposure techniques not only reduces noise but also opens up creative opportunities for capturing stunning low light scenes with exceptional clarity and detail.
Adjust ISO Settings
Employing long exposure techniques while adjusting ISO settings is crucial for achieving optimal image quality in low light conditions. By making manual adjustments to the ISO settings, photographers can control the sensitivity of the camera sensor to light, reducing noise and producing clearer images. Additionally, utilizing exposure compensation allows for fine-tuning the exposure levels, ensuring well-balanced and properly exposed photos in low light. When using long exposure techniques, it's important to consider the impact of low light on white balance. Manual adjustments to the white balance settings can help maintain accurate color representation and avoid undesirable color casts in the final images. By combining these techniques, photographers can effectively capture high-quality photos in challenging low light environments.
| ISO Settings | Long Exposure Techniques |
|---|---|
| Manual adjustments | Control sensor sensitivity |
| Exposure compensation | Fine-tune exposure levels |
| Low light impact | Consider white balance |
| White balance adjustments | Maintain accurate color representation |
Consider Noise Reduction
Continuing our exploration of optimizing image quality in low light conditions, we now turn our attention to considering noise reduction through the use of long exposure techniques.
- Utilize Long Exposure: Experiment with longer exposure times to capture more light, which can help reduce the impact of noise in low light situations.
- Leverage Post Processing Techniques: Take advantage of software tools to apply noise reduction algorithms and enhance the quality of low light images during post-processing.
- Consider Sensor Size: Larger sensors generally produce less noise in low light conditions, so selecting a camera with a larger sensor can aid in noise reduction.
Employing these strategies, such as experimenting with long exposure, utilizing post-processing techniques, and considering sensor size, can significantly improve the quality of images captured in low light environments.
Utilize Image Stabilization
We can enhance our low light photography by utilizing image stabilization to minimize camera shake and reduce noise in our photos. Image stabilization benefits us by providing sharper images and reducing the need for high ISO settings, which can lead to increased noise in low light conditions. By stabilizing the camera, we can achieve clearer and more detailed images, even in challenging lighting situations. Here are some low light photography techniques to consider when utilizing image stabilization:
| Low Light Photography Techniques | Benefits of Image Stabilization |
|---|---|
| Use a tripod or monopod | Minimizes camera shake |
| Utilize lenses with built-in stabilization | Reduces blur and noise |
| Enable in-body stabilization in your camera | Improves image sharpness |
| Lean against a stable surface | Decreases the risk of blur |
| Use image stabilization software | Enhances overall image quality |
Employ Noise Reduction In-Camera
When it comes to reducing noise in low light photography, employing in-camera noise reduction can make a significant difference in the quality of your images. Adjusting the settings for noise reduction in your camera can help minimize the visual disturbances caused by shooting in low light conditions. By taking advantage of in-camera processing, you can benefit from cleaner, more professional-looking photos even in challenging lighting situations.
In-Camera Noise Reduction
To effectively reduce noise in low-light conditions, consider employing in-camera noise reduction as a key technique. In-camera noise reduction can significantly improve the quality of low-light photographs by reducing graininess and digital noise. Here are some reasons why in-camera noise reduction is beneficial:
- Immediate Processing: In-camera noise reduction processes the image immediately after it is captured, saving time in post-processing.
- Customizable Settings: Many cameras offer customizable in-camera noise reduction settings, allowing photographers to tailor the level of noise reduction to their specific needs.
- Preservation of Details: In-camera noise reduction algorithms are designed to reduce noise while preserving image details, resulting in high-quality photographs even in challenging low-light scenarios.
Settings for Noise Reduction
After understanding the benefits of in-camera noise reduction, adjusting the noise reduction settings in your camera can further optimize the quality of low-light photographs. By customizing these settings, you can achieve clearer and more professional-looking images. Here's a table summarizing the key settings for noise reduction:
| Setting | Description | Recommendation |
|---|---|---|
| ISO Sensitivity | Adjusts the camera's sensitivity to light | Keep it as low as possible for less noise |
| Long Exposure NR | Reduces noise in long exposure shots | Enable for exposures over 1 second |
| High ISO NR | Reduces noise at high ISO settings | Set it to low or medium for better results |
| Custom Presets | Save and apply custom noise reduction settings | Create presets for different shooting conditions |
| Advanced Software | Utilize advanced software for additional noise reduction | Explore advanced post-processing tools for further noise reduction |
Benefits of In-Camera Processing
Incorporating in-camera noise reduction processing enhances image quality and reduces the need for extensive post-processing. There are several benefits of utilizing in-camera noise reduction:
- Saves Time: In-camera noise reduction reduces the time spent on post-processing, allowing for quicker delivery of high-quality images.
- Preserves Details: It helps in preserving important details in the image, especially in low light conditions, without sacrificing image quality.
- Impact of Sensor Size: In-camera noise reduction can have a significant impact on smaller sensor cameras, where noise can be more pronounced, resulting in cleaner images.
Consider Using a Tripod
Consider using a tripod to stabilize your camera and minimize the risk of blurriness in low light conditions. Tripod stability is crucial for capturing sharp images in challenging lighting situations. Below is a table outlining the benefits of using a tripod for low light photography techniques:
| Benefits of Using a Tripod |
|---|
| 1. Increased stability |
| 2. Minimized blurriness |
| 3. Longer exposure times |
| 4. Precise composition |
| 5. Reduced fatigue |
Using a tripod provides increased stability, which is essential for preventing camera shake and achieving sharp images. It minimizes blurriness, allowing for clearer and more defined photos, even in low light. Additionally, using a tripod enables longer exposure times, which can be beneficial for capturing more light in low light conditions. It also allows for precise composition and reduces fatigue, providing the photographer with a steady platform for capturing stunning low light shots. By considering the use of a tripod, photographers can elevate their low light photography techniques and achieve exceptional results.
Understand Sensor Size Impact
Understanding the impact of sensor size is crucial for achieving optimal results in low light photography. As sensor technology advancements continue to push the boundaries of what is possible, it's important to grasp the significance of sensor size on noise levels in low light conditions. Here's what you need to know:
- Light Sensitivity: Larger sensors have a greater surface area, allowing them to capture more light. This results in improved low light performance and reduced noise levels, leading to clearer and sharper images in challenging lighting situations.
- Pixel Size: Larger sensors often have larger pixels, which can capture more photons. This results in better light gathering capability and reduced noise, especially in low light conditions.
- Dynamic Range: A larger sensor typically offers a wider dynamic range, allowing it to capture more detail in both highlights and shadows. This can lead to better image quality and reduced noise in low light environments.
Understanding how sensor size impacts noise levels in low light photography is essential for harnessing the full potential of modern sensor technology advancements. By choosing the right sensor size, photographers can significantly improve the quality of their low light images.
Leverage Post-Processing Software
To maximize the quality of low light photographs, photographers can enhance their images by utilizing post-processing software to reduce noise and improve overall image clarity and sharpness. Post-processing techniques play a crucial role in noise reduction, color correction, and image enhancement, allowing photographers to achieve stunning results even in challenging low light conditions.
| Post-Processing Techniques | Benefits |
|---|---|
| Noise Reduction | Minimizes graininess and improves image quality. |
| Color Correction | Enhances the colors and tones to bring out the true essence of the scene. |
| Image Enhancement | Improves overall sharpness and clarity, bringing out finer details. |
| Exposure Adjustment | Corrects underexposed or overexposed areas for a balanced look. |
| Sharpening | Enhances the overall sharpness of the image without increasing noise. |
Choose the Right Lens
Using a wide-aperture lens can significantly improve low light performance and reduce noise in your photographs. When selecting a lens for low light photography, there are several factors to consider.
- Lens selection: Look for lenses specifically designed for low light conditions. These lenses are often labeled as "fast lenses" due to their wide apertures, such as f/1.4 or f/1.8.
- Aperture size: A wider aperture allows more light to reach the camera sensor, enabling faster shutter speeds and lower ISO settings, which can result in reduced noise in low light conditions.
- Image stabilization: Consider lenses with built-in image stabilization to further aid in capturing sharp, noise-free images in low light situations.
When shooting in low light, the right lens can make a significant difference in the quality of your photographs. By choosing a lens with a wide aperture and other features tailored for low light conditions, you can effectively reduce noise and capture stunning images even in challenging lighting environments.
Master White Balance Control
Mastering white balance control is essential for achieving accurate and natural colors in your photographs, especially in varying lighting conditions. Mastering color temperature and making precise white balance adjustments are crucial for obtaining true-to-life colors. In low light situations, understanding sensor sensitivity and optimizing ISO settings go hand in hand with white balance mastery. By adjusting the white balance settings, you can ensure that the colors in your photos appear as they do in real life, even in challenging lighting environments. The ability to master white balance control gives you the power to convey the mood and atmosphere accurately, whether it's the warm glow of candlelight or the cool tones of moonlight. By taking control of white balance, you can elevate the quality of your low light photography and produce images that captivate viewers with their authentic colors and nuanced details.
Explore Noise Reduction Filters
Exploring noise reduction filters can significantly improve the quality of low light photographs by minimizing unwanted grain and preserving image sharpness. When it comes to reducing noise in low light photography, considering noise reduction filters is essential. Here are some key points to consider when exploring noise reduction filters:
- Custom Filter: Utilize custom noise reduction filters that allow for fine-tuning the reduction level to match the specific noise pattern in your low light images. This customization can help maintain image details while effectively reducing noise.
- Noise Reduction Software: Invest in noise reduction software that offers advanced algorithms to intelligently identify and reduce noise without sacrificing image quality. Look for software that provides customizable settings and batch processing capabilities to streamline the noise reduction process for multiple low light photographs.
- Filter Stacking: Experiment with filter stacking, combining multiple noise reduction filters to achieve optimal results. Layering different filters with varying strengths can effectively tackle different types of noise, resulting in cleaner and sharper low light images.
Exploring and implementing noise reduction filters, whether through custom filters, noise reduction software, or filter stacking, can significantly enhance the quality of low light photographs by minimizing noise and preserving image details.
Experiment With Different Light Sources
Experimenting with different light sources can drastically impact the mood and visual appeal of your photographs. Light temperature experimentation is a powerful way to create unique and visually striking images. By using light sources with varying color temperatures, such as warm incandescent bulbs, cool fluorescent lights, or the natural glow of candlelight, you can evoke different emotions and atmospheres in your photos. Creative lighting techniques, such as using colored gels or diffusers, can further enhance the visual interest of your images. Experimenting with unconventional light sources, like string lights, neon signs, or even a simple flashlight, can add an artistic and unexpected element to your photographs. These techniques not only reduce the reliance on traditional lighting setups but also allow for more experimentation and artistic expression in low light conditions. By exploring different light sources, you open up a world of creative possibilities, adding depth and intrigue to your photography.
Frequently Asked Questions
Can I Use Noise Reduction Software to Fix Noise in Low Light Photos?
Yes, noise reduction software is effective for fixing noise in low light photos. Our team has found that using noise reduction techniques in post-processing can greatly improve the quality of low light photography from smartphone cameras.
Will Using a Higher Quality Lens Help Reduce Noise in Low Light Conditions?
Using a higher quality lens is effective in reducing noise in low light conditions. It allows more light to enter, reducing the need for high ISO settings which can contribute to noise.
How Does the Size of My Camera's Sensor Impact Noise in Low Light Photos?
We noticed that a larger sensor in our camera greatly reduced noise in low light photos, giving us clearer and more vibrant images. Understanding ISO settings in low light photography is crucial for maximizing sensor performance.
Is It Possible to Reduce Noise in Low Light Photos Without Using a Tripod?
Yes, it's possible to reduce noise in low light photos without a tripod. By adjusting camera settings and using handheld techniques, along with post-processing noise reduction techniques, we can achieve better results in challenging lighting conditions.
What Are Some Common Mistakes to Avoid When Trying to Reduce Noise in Low Light Photography?
Common mistakes to avoid in low light noise reduction include using high ISO unnecessarily, improper exposure, and over-processing. Effective techniques involve using lower ISO, longer exposure times, and noise reduction software.
